What’s the key to maximizing fuel efficiency and handling performance for your tires? The answer is simple: maintain the correct air pressure. Checking tire pressure is a crucial step for ensuring longer tire life and safety, and it can be done in minutes. In this guide, we’ll walk you through five easy steps to check your tire pressure.
1. Find the recommended pressure for your tires
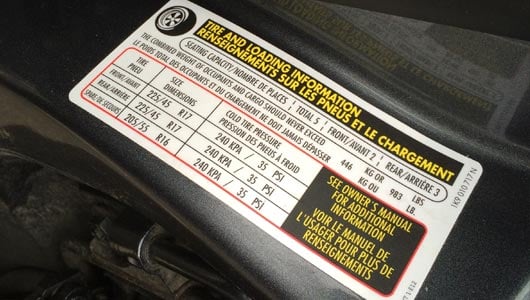
To find the recommended tire pressure for your vehicle, check one of these three locations:
- A sticker on the driver’s side door jamb
- Your owner’s manual
- Near the trunk lid, console, or fuel door
Look for a two-digit number followed by ‘PSI’ (pounds per square inch). A typical recommended air pressure for passenger vehicles is 35 PSI.
It’s important to maintain this pressure, as it represents the minimum air pressure required to support your vehicle’s weight. Avoid using the ‘MAX PSI’ marked on your tire’s sidewall, as it indicates the highest possible pressure, not the optimal or recommended pressure.

2. Timing is key when checking tire pressure
When’s the best time to check tire pressure? Aim for when they’re ‘cold’ – like early in the morning or after your vehicle has been parked for a few hours (preferably in the shade). Warm tires can give you inaccurate readings.
It’s a good idea to check your tire pressure once a month. To make it a habit, some people do it every time they fill up on gas. If your tire is hot, don’t lower the pressure to the recommended PSI; the pressure will decrease as the tire cools down.
3. Choose a reliable tire gauge for accurate readings
Having a reliable tire gauge handy makes frequent tire pressure checks a breeze.
Tire gauges can be sensitive to rough handling, and those at gas stations might not be accurate, so it’s essential to use a gauge you trust.
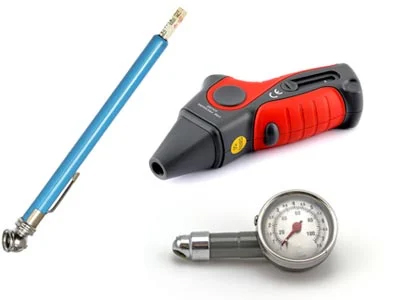
There are three types of tire gauges:
The stick tire gauge – The old stick gauges look a bit like a metal pocket pen. Inside is a bar or rod that slides out when the valve end of the stick gauge presses the valve stem of the tire.
The dial tire gauge – Dial gauges, also known as analog gauges, have a round, clock-like face.
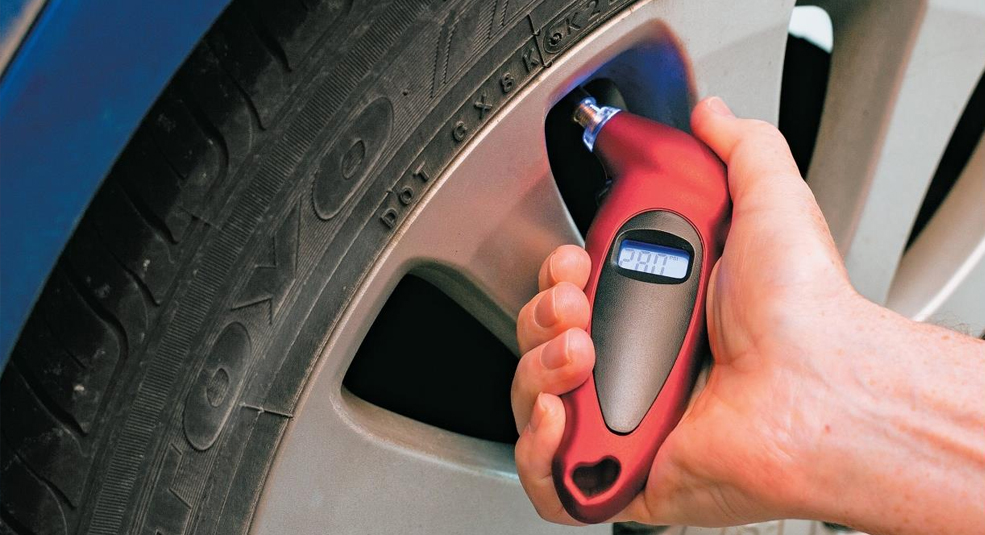
The digital tire gauge -It uses an electronic LCD display, making it simple to get your tire pressure reading on a digital gauge.

4. Time to check your tire pressure
With your trusty tire gauge in hand, follow these steps to check the pressure:
Remove the valve cap from the tire.
Press the tire gauge onto the valve. If using a stick gauge, use the open end, not the side that releases air.
Wait for the pressure reading to appear. On a stick gauge, wait for the white plastic stick to stop moving. With a dial gauge, wait for the needle to stop. We recommend checking two or three times for accuracy and doing this for all four tires and the spare.
5. Adjust tire pressure as needed
Compare your readings to the manufacturer’s recommended tire pressure. Inflate to the suggested air pressure. If overfilled, release air by pressing the metal stem in the valve’s center. Recheck the pressure and adjust if needed. Don’t forget to replace the valve cap!
Note: Don’t drive on tires under-inflated by 25% or more. This can damage the tire casing and cause dangerous blowouts.
And while you’re at it, check your spare tire too! It’ll ensure you’re prepared for any unexpected flats.
Your local mobile tire service provides the convenience of on-the-go assistance, including tire pressure checks, ensuring your vehicle’s safety and efficiency with ease.
